How To Accept Payments With Stripe
July 26, 2021
So you just created an amazing application and now you need to actually get paid for it but you have no idea where to start. That is perfect because in this article I will show you step by step how to setup Stripe with Node.js and accept payments through this beautiful UI.
Before we get started I do want to mention that Stripe’s documentation is amazing and I highly recommend using their documentation alongside this article.
If you prefer to learn visually, check out the video version of this article.
Setup
The first obvious step to get started is to create an account with Stripe. You will also need to make sure you fill in all information about your business (tax information, address, etc.) to ensure you are legally compliant before accepting payments. Once that is done the next step is to get your project setup.
You will need a Node.js server to integrate Stripe so if you do not already have a Node.js express server setup then you will need to do the following.
Setting Up An Express Server
- Run
npm initto create a package.json file for your project - Run
npm i stripe express dotenvto install stripe, express, and dotenv - Create a file called
server.jsand include the following code.
// Load environment variables from the .env file into process.env
require("dotenv").config()

// Setup express
const express = require("express")
const app = express()
app.use(express.json())

// Setup Stripe
const stripe = require("stripe")(process.env.STRIPE_PRIVATE_KEY)

// This is the list of items we are selling
// This will most likely come from a database or JSON file
const storeItems = new Map([
  [1, { priceInCents: 10000, name: "Learn React Today" }],
  [2, { priceInCents: 15000, name: "Learn CSS Today" }],
])

// Start up our server on port 3000
app.listen(3000)
Connecting The Client Side
Before we write any more code for the server we are going to focus on how you connect the client side of your application to the server. In my opinion the best way to do this is with a fetch request since most likely your server will be an API that you are calling from your client. The code to do this is as follows.
// Initiate a POST request to the server
// If the server is on a different domain than the client
// then this needs to be the full url
// http://localhost:3000/create-checkout-session
fetch("/create-checkout-session", {
  method: "POST",
  headers: {
    "Content-Type": "application/json",
  },
  // Send along all the information about the items
  body: JSON.stringify({
    items: [
      {
        id: 1,
        quantity: 2,
      },
      {
        id: 2,
        quantity: 1,
      },
    ],
  }),
})
  .then(res => {
    if (res.ok) return res.json()
    // If there is an error then make sure we catch that
    return res.json().then(e => Promise.reject(e))
  })
  .then(({ url }) => {
    // On success redirect the customer to the returned URL
    window.location = url
  })
  .catch(e => {
    console.error(e.error)
  })
This is a lot of code so let’s break down exactly what is happening. On the client we are making a request to an endpoint on our server and sending along the id and quantity of each item the customer wants to purchase. Then if the request is successful we redirect the customer to the url returned from the API.
Important Notes
- If the server and client are on different domains then you will need to use the full server URL when doing the fetch request (
http://localhost:3000/create-checkout-sessioninstead of/create-checkout-session) - Never send price information from the client to the server. Since the customer has access to the client code they could change the price information if we send it from the client. This is why everything is done with ids on the client and the server handles all Stripe integration and pricing.
Connecting The Server Side
We now are able to make a request from the client to the server on an endpoint called /create-checkout-session. The next step for us is to create this endpoint on our server and return a valid URL to the client by adding the following code inside our server.js file.
// Create a post request for /create-checkout-session
app.post("/create-checkout-session", async (req, res) => {
  try {
    // Create a checkout session with Stripe
    const session = await stripe.checkout.sessions.create({
      payment_method_types: ["card"],
      // For each item use the id to get it's information
      // Take that information and convert it to Stripe's format
      line_items: req.body.items.map(({ id, quantity }) => {
        const storeItem = storeItems.get(id)
        return {
          price_data: {
            currency: "usd",
            product_data: {
              name: storeItem.name,
            },
            unit_amount: storeItem.priceInCents,
          },
          quantity: quantity,
        }
      }),
      mode: "payment",
      // Set a success and cancel URL we will send customers to
      // These must be full URLs
      // In the next section we will setup CLIENT_URL
      success_url: `${process.env.CLIENT_URL}/success.html`,
      cancel_url: `${process.env.CLIENT_URL}/cancel.html`,
    })

    res.json({ url: session.url })
  } catch (e) {
    // If there is an error send it to the client
    res.status(500).json({ error: e.message })
  }
})
Now this code is a bit more complex so let me break it down. Essentially we have an endpoint that is taking all the item information from our client. This information is in the form of a JSON object that has an items key which contains an array of items with an id and a quantity.
The first thing we do is call stripe.checkout.sessions.create which takes a single object containing all the information for checkout:
payment_method_types: This takes an array of all accepted payment methods such as bank transfers or credit cards. For most cases you can just leave this ascardsince usually you only want to accept cards.mode: This determines whether this will be a subscription or one time payment. Since this article only deals with one time payments we will leave this aspayment.success_url: This is the URL we will direct customers to after a successful payment.cancel_url: This is the URL we will direct customers to if they cancel the purchase.line_items: This is an array of items that the customer is purchasing. The format for each line item is as follows:price_data: This is an object that contains the information on the product such as name and price. It is important to note that all prices in Stripe are defined in cents so a 10 dollar item would have aunit_amountof 1000.quantity: This is the number of the item the customer wants to buy.
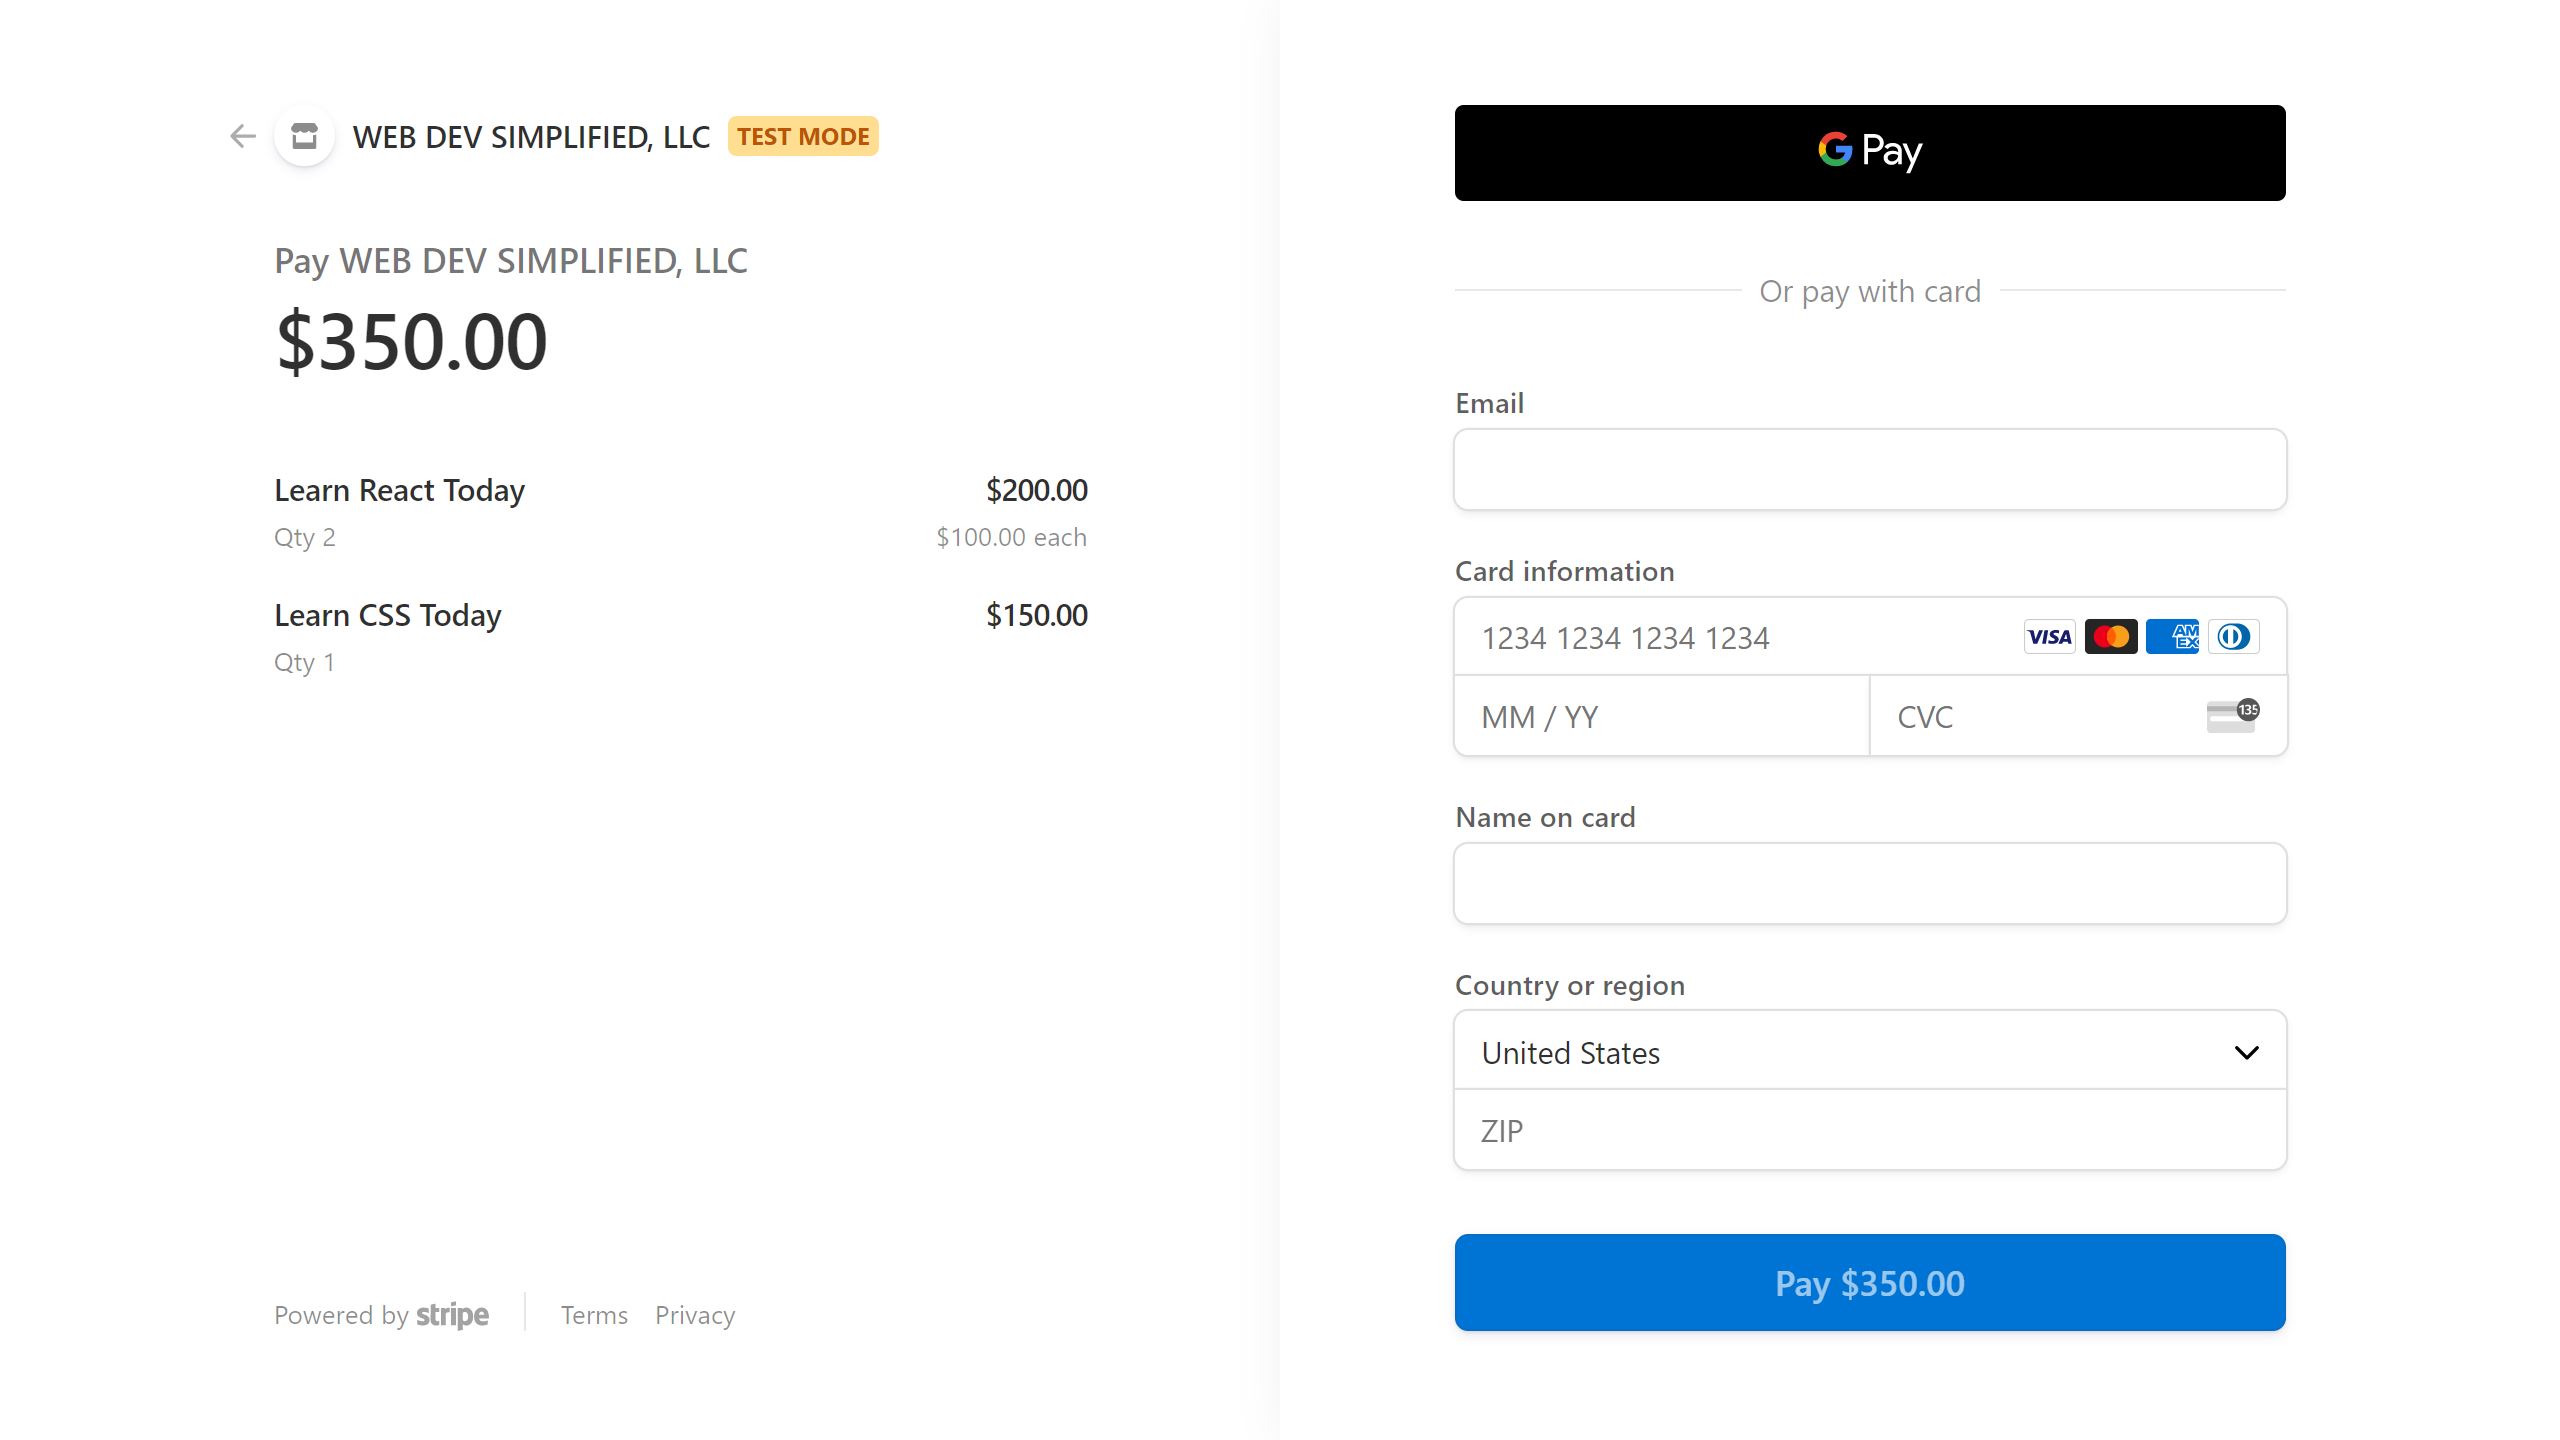
Finally after we have the session created we can get the URL from that session and send it to our client. This URL will direct the user to Stripe checkout page where they can enter all their payment information.
Finishing Touches
This is all the code we need to write for the project, but we still need to finish setting up our environment variables. To do this we can create a file called .env at the root of our server. Inside that file we want to store key value pairs for our Stripe private key and our server url.
STRIPE_PRIVATE_KEY=<your_key>
CLIENT_URL=https://client.com
Now in order to get your Stripe private key you just need to go to your Stripe account dashboard under the Developers section in the sidebar and click on API Keys. Here you can view your secret key. It is important to note that Stripe has a test and live mode, though, and that you will want to make sure you click the View test data toggle in the sidebar to access your test API key to use in development.
With this API key you can create charges that will show up in the test data section of your Stripe account without actually spending any real money. If you want to test for a successful charge just use a card with the number 4242 4242 4242 4242, an expiration date in the future, and any CVC. Stripe also has tons of other cards you can use for testing that result in different error/success messages. You can view them all here.
Conclusion
That is all it takes to setup Stripe in your application. With just a few lines of code you can now accept payments within a beautifully designed UI provided by Stripe.